Wednesday, September 17, 2014

Tea Cups and Gunsmoke

We vintage sellers are basically recyclers of "stuff". In our never ending  quest for things to offer for sale in our shops we always have an eye out for some else's "this old thing". (As in - "What am I going to do with this old thing?") We find the "stuff" (not junk --- treasures) that other people just want to get rid of, get out of their way, and offer it to other people who have been looking for just that certain treasure. As in our shop at www.SundayzChild.etsy.com


Our finds are often beautiful - like this Royal Sealy teacup - a happy find for collectors or just lovers of beautiful things.


Or they evoke memories of running in from evening play to watch another installment of  a thrilling adventure from Hollywood's imagination.


Sometimes, we can offer memories of summer picnics next to a lake or in a sunny glade in the woods. The kind eaten while seated on a blanket on the ground.                


And once in a while we find something that speaks of a time before most of us can remember. A dazzling age that we only read about and admire the style.
I didn't get to keep this beautiful Art Deco bar caddy very long but am very happy it found a home with people who appreciate it's beauty and unique quality.


Sunday, July 28, 2013

It's Time To Start Anew

We live in the country in South Central Missouri outside of a small town. The county road that goes past our driveway is gravel and we can’t see the neighbors house. Like so many other people who are trying to make ends meet our small business is rather diversified. We have three, soon to be four, online stores. We, also, have a tiny rental house in town. 

Our family consists of eight cats and seven dogs. A couple of goats and some chickens round out the herd. 

All of our animals needed homes when they came to us. At some point I will probably do a post on the extreme contempt I hold for people who abuse and/or throw away the helpless beings in life. 

The rental house was occupied by a nice lady for almost a year, but she, unfortunately, became ill and had to give it up. We have been doing some repair and remodeling work on it ever since and hope to have it ready to rent again soon. It goes slowly - my husband is disabled and there are many other claims on our time so we only work on the house as we can. As I write this we helped friends with electrical problems repair them today and tomorrow I drive another friend to a doctor’s appointment in St Louis, 4 hours away. I did some posts when we first bought the house and were doing the initial remodeling. The emphasis of this blog then was on the house and getting it ready. And on the staving puppy we found on the first day we went there after we took possession. We have come a long way since then. Mostly we just have to do surface stuff now on the house and the starving puppy weighs 40 pounds. 


Our online stores are www.SeventhChild.etsy.com, www.7thStash.etsy.com, and www.nakedbones.etsy.com


SeventhChild is our handmade and vintage jewelry shop. I make jewelry, rather pretty and unique if I do say so myself, and make punched tin panels for wall hangings or pie safe restoration. I also hand engrave glass but I don’t have much of that listed right now. We make soap and shampoo bars. As soon as cool weather gets here we will be listing a wonderful body butter I’ve developed. We have to wait for cool weather because it has no preservatives or chemicals in it and it just doesn’t ship well in the heat. Finally we have some rather nice pieces of vintage jewelry.  


7thStash has art, craft, hobby, and sewing patterns as well as lace and fabric. I’ve just started listing some jewelry making books. There are also a few tools for jewelry making. 


NakedBones has, well, bones. Goat and horse to be exact. My sister’s horse that died a few years ago, of natural causes, and some of our pet goats that have died. We are not sentimental at all about bones. What made these loved creatures unique didn’t reside in their bones. They don’t need them anymore and neither do we so we are selling them. Also, we list a lot of found metal objects. Rusty bits and pieces for recycling and use in jewelry and art work. Assemblage, robot art, steampunk, outsider art, etc. Also, containers for primitive or rustic planters. 


As soon as we can manage to get it up and stocked we will be opening our vintage shop, SundayzChild, also on Etsy. It will have a lot of teapots and Ruby Glass among other vintage glass wear. 


Our interests are many and varied and I tend to write about whatever has caught my interest in the moment so it’s hard telling just what will pop up here. 


I've added the picture of the earrings at the top of the page because I'm very proud of the way they turned out. They are elegant in their simplicity and very attractive. Long sterling silver chains fall to the gorgeous Picasso Czech glass beads. Lots of subdued color and flash here. They are available from my shop  SeventhChild on Etsy.

Sunday, April 15, 2012

Finally!! It's done! Well, mostly.

It's been almost a month since my last post. We've been so busy on actually getting the house ready for occupancy that there just wasn't time to write about it. I'll get everything caught up now. It's been interesting, frustrating, rewarding, exhausting, enjoyable, and scary. In the end, though, it's all good. We had a ball. Our "crew" of workers were not always knowledgeable about the things we asked them to do but were always willing to follow directions when they didn't know and give it a try.
I found that a big key to not driving yourself, and everyone around you, insane is to be flexible and not spend too much time making decisions. My first preference for the kitchen counter was Formica that we would buy and glue on our base. When we went to the  big box store, an hour and a half away, that was supposed to have such a big selection of the stuff we found only six types and they were pretty bad. So, we decided on ceramic tile. When we got the Luan plywood glued down on the base in preparation for the tile my husband convinced me that it was too pretty to cover up so we sealed it with polyurethane instead and didn't use the tiles. It will wear as well as the Formica and really is very pretty.

We got the hole in the floor closed up with in a couple of days of my last post. Unfortunately, Don was out of commission for three weeks after his work under the floor. He had some sort of flu bug that left him weak and tired for days after it ran it's course.


Don had started building, under Danny's direction, the bar part of the cabinet. When he couldn't work for those weeks we hired Mike and he and Danny finished that and built the upper cabinet and the extension next to the sink cabinet. These were all my designs, Danny's plans and Don and Mike's labor.
Since someone stupidly took out a bearing wall to put that useless 3/4 wall in we had to jack up the ceiling and support it somehow. We wound up putting in a 2x12 plate with two 2x4's sandwiched together on edge for strength backing it up.

 Then on the walls under the ends of the plate we put 2x12's just as an extra support. It's looks good and works great. The ceiling and rafters are stable and won't be settling anymore.  As you can see in this picture we've finished the reconstruction on the floor and wall and have closed the holes up.

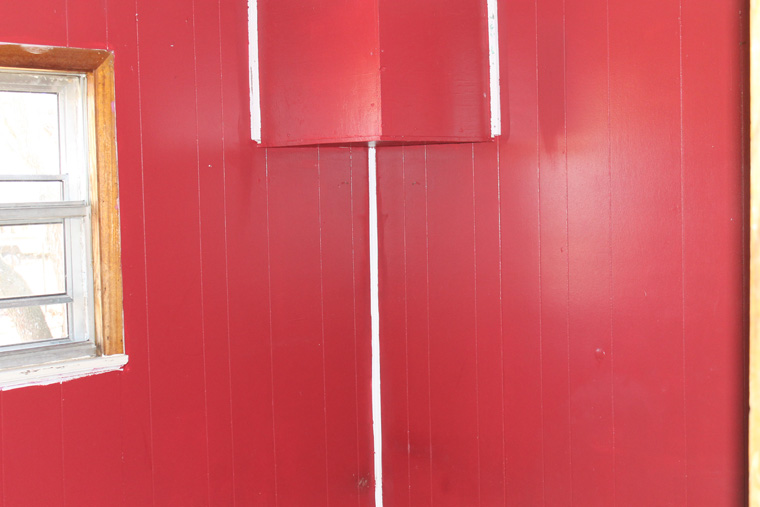
I wrote in an earlier post about the over sized space stealing box hanging in the corner of the red bedroom that was covering a small vent pipe and how we had made that much smaller and slanted it. I still need to trim it out but this is what it looks like now. You can just barely see it in the picture and it isn't that noticeable in actuality.


I just don't understand the reasoning behind the shoulder height box, way over sized for it's purpose, protruding awkwardly into this tiny room.

There are still a few things to do inside and several outside. Inside, the kitchen cabinets still need some of the doors hung and there is a small amount of trim that still needs to be painted and put in place. This is all trim that had to be replaced because the original was just to bad to reuse or some trim that I decided to put in place for a more finished look after we were done. Then there's the edging trim around  the counter top. I'm going to have to order that online yet. I still have to paint or cover the floor in the long narrow room in the back of the house. The doorway is off the kitchen and it runs the length of the house ending in the utility alcove on the other end. At least part of it could be used as living space. And then there is the problem of the space for the washer and dryer that needs to be dealt with. Washer and dryers are pretty standard size wise. This alcove was obviously built for regular sized units but whoever built the area made it a half an inch too small. The drywall tape on that end of the room had to be stuck back on the wall and the floor is small scraps of plywood pieced together. (I'm sure you all know the kind of unethical people that do this kind of work. They cash the checks quickly after being paid for their services before their work starts to fall apart.) So we are going to have to take the window trim and baseboards, and possibly a section of the drywall, out to get the units to fit. If the drywall has to be removed we'll have to replace it with something very thin, maybe a piece of painted luan.

But we've finally gotten to the point of occupancy. Our renter moved in Thursday and is working around the things we have yet to finish. The following pictures are mostly of the kitchen area because that's where most of the work was done.


I am most proud of this. You can see the new counter and cabinets, get a glimpse of the beautiful flooring, and see into the back bedroom previously of the hanging box and lurid red walls.


This is a shot of the finished counter top and the back splash. And the bottom of the new wall cabinet.


The kitchen from the front door. Notice the door in the counter that opens into the living room. Unusual, yes, but I didn't want a cabinet with dead useless space in it. What's the point of putting a cabinet in that you have to crawl into to access.


This is, of course, the sink counter. New receptacle on this end.


The view from the back room through the kitchen to the front door.


Well, that's all I've got to show you now. Maybe, after the furniture is in our renter will allow me to take some more pictures. It's up to her though. She has been patient with the delays we've experienced and understood that, no matter what our expectations were and are, reality can not be changed. The house wasn't ready when we expected it to be and she didn't stress out about it. I didn't either so we got through it with out problems. Some inconvenience, yes, but then, sometimes that happens in life. 

As I've spoken to people in town about what we were doing with this tiny house word has gotten around. I had three people inquire about renting this house in the last two weeks and had to tell them it's taken. Not to bad in a town of two thousand with other rentals available. They all wanted to know if we have other rentals. We don't. Yet. Several times, during this process, I've sworn I will never do this again.............  At least not until next year................ Unless another really good deal comes along................ Really!

Sunday, March 25, 2012

Making Progress And A Big Mess

Replacing Foundation Baseboard

Repairing Inside of Exterior Wall


It's been a few days since my last post simply because almost every waking minute has been spent at the tiny house working. I have white paint everywhere including my hair and eyeballs. But we have made significant progress, thank goodness. The week didn't start out good. One of our workers came down with  a bug that put him out of commission for the week. Another was unavailable on Monday and sick on Wednesday. Fortunately, we found someone who is good at carpentry, willing to do any kind of work, and was available. It set us back a bit but not as much as it could have.

I think I left it last time with a hole in the floor caused by water leaking in through improperly installed duct work. When we got into it we found a good amount of damage to the floor and wall. Actually, the base board that rests on the foundation was rotted in that spot. So that had to be cut out back to good wood so it could be replaced.
This is the mess we uncovered when we started investigating the buckled panelling below the cold air return. The black area below the lower left corner of the return is building paper exposed when the rotten wood was pulled away.                                                                                            


The soaked wood had to be dried out and we treated it and the replacement peices with a Borate spray.
 The new wood is the replaced piece that rests on the foundation and we used a piece of oak plank from the wall we took out to replace the outside wall board that was rotten. Once that was in place the rest of the area was framed in and reinforced. Getting the frame work in place was a bit of a problem. It was a very awkward area to reach. So Don, our worker and friend, after trying several different ways of doing this finally decided this was the only way.
We have often been grateful for Don's help, but, I think this goes above and beyond what most would do on a job. There just is no way I could do this.
I was uncomfortable just looking at him down there..

Blindly reaching for a screw because he couldn't sit up far enough to see where they were.

And done!! Poor guy. He was definately relieved to get out of there.
None of this damage would have happened if the installers of this outside furnace and a/c unit had done it properly. Like I said before, I don't know if  laziness or greed or stupidity was the cause of this screwed up mess but, off hand, I'd rule out stupidity. They'd have to be really profoundly dumb not to notice that the vent was sloped toward the house instead of away. Even stupid people know that water runs down hill. Or that duct tape isn't waterproof. That leaves lazy or greedy. Or, probably, both.  


Sunday, March 18, 2012

Building Counters and Fixing Crappy Refinishing Work

I sort of left you hanging while we talked about Sage the Parvo survivor and days off and making soap and such. But, I'm excited about the progress on the tiny house and wanted to show you what has been going on. A lot of what we havehad to do has been fixing totally crappy refinishing work from the last few remodels on the house. I don't know of it was incompetence or laziness but most of it is horrible.

The counter that's going to be between the kitchen and living room is coming along nicely. As a matter of fact it's almost done except for the top. I've thought about using tile for the top but can't find anything  in our price range that I like. So we've decided to use regular laminate. We are going to do it ourselves to save money and because it's a nonstandard size.
                                                                       Anyway, here is the base going together:

This is the living room side. There will be a door on this side. A little unconventional, I admit, but better than trying to access a deep around the corner cabnet space that's under the counter top  from the kitchen side. Especially since there will be an eight inch counter top overhang on that side. I've designed it that way for knee room if the renter doesn't want to fit a table somewhere in the tiny living room or smaller kitchen.

This is the kitchen side and base. If it works out the way we expect we are going to round off the corners of the top for easier passage. I really hate sharp corners digging into my sides. The doors have to be made yet. All of this comes apart to put the flooring in place. I'll get it primed and painted while it's in pieces


This box descending from the ceiling in one of the bedrooms was very large for the area. A cube, about 2' X 2', with the bottom only 5' above the floor it was an awkward obstacle in the small room. Danny figured out it was covering the vent that goes into the laundry area on the other side of the wall.  
                                                                                                                                    
When we took it apart this is what we found. A lot of wasted space making an already small room even smaller.
So this is what we did. You can see, by the white walls that were under the boxed in area how much smaller we made the cover. Since it's also now angled and no longer hanging out in the room the space under it becomes usable again. The BOX IN THE CORNER no longer dominates the room. We'll cover the plywood with a bit of paneling and it'll get painted along with the rest of the walls and will almost disappear. At the very least it will be out of the way.  It's difficult to immagine what the "remodlers" who originally built the cover like that were thinking. 

It's getting late and I'm tired. I hope to show you the problem we found when we checked under some buckled paneling in a post tomorrow. Again, it was from an improperly installed furnace duct leaking rain into a wall. There has been a surprising amount of shoddy work done on this poor little house. Fortunately, none of it did extensive damage that can't be fixed.

Soap Making Mini Vacation

I took the day off from working on the house yesterday and just did fun stuff. Among other things I got to make a batch of soap. The scent for this one, our eighth batch, is Citrus Splash. I thought I'd share my process with you just for fun.

First of all, when we decided to start making soap for our local Farmer's Market this year I talked to a good friend, a soap maker. She invited me over for coffee and talked me through the whole process. That was an eye opener. I really didn't know anything about making soap even though I sort of remember mom making it.  I had some vague idea that it involved cooking something on the stove and a lot of stirring. But mom rendered her own lard and that may be where that memory came from. We had an old Charter Oak wood cook stove when I was growing up and that's my memory. Mom stirring a huge old pot on that stove. And it was connected to making soap somehow.

Mom's soap was just lard and lye. I must have been very young the last time she made it because my memories are so sketchy. I remember she had collected ash from the stove. She put them in a sieve and poured water over them so she must have been making the lye she needed. But I don't remember how much water or ash or, obviously, the amount of lye she got out of the process. Anyway, I do remember the finished product. It was hard and brown and didn't have any scent that I remember. But it cleaned good.

I make my own lard and lye soap now. I don't make my own lye or render my own lard and I put scent in it. Mine is hard and white and smells of Lavender and Eucalyptus and mint. It still cleans real good.


Yesterday's soap didn't have any lard in it at all. I used a four oil recipe for this one. This is everything needed to make a batch. Well, except for the mold and liner. Actually, here I've already mixed the lye and water and it's cooling.


The oil is weighed out and mixed prior to heating. Every measurement is by weight not volume.


The oil and lye solution is mixed together and stirred until ready. Then it's poured into the mold, covered, and put to bed for 24 hours or so. My husband made this mold out of scrap lumber and we line it with butcher paper.


Out of the mold but still wrapped in the liner this log of soap is just in the right stage to cut.
Unwrapped.
I need a guide to cut the soap into bars or they come out very uneven. I didn't have one so I repurposed on old bread cutting guide and it works great. Using every other slot the bars are cut exactly one inch thick and weigh between 4.5 and 5 ounces.
A crinkle cutter makes a really nice bar.

We don't have drying racks or much room to spread out so we're repurposing old plastic soda crates by turning them upside down. I can get two batches of soap on each case. By turning another one upside down on top the soap is protected from my kitties while it cures. The bars should be cured and ready to use in about four to six weeks. My house smells wonderful with all these scents from the curing soap bars.


Wednesday, March 14, 2012

Learning Life Leasons

 Sage is growing so fast. We've only had her 16 days but can already see how much bigger she is.  She is still not house broken but I think that's mostly our fault. We're so busy sometimes we forget that she is still a baby. She just can't hold it very long. Poor little thing. She's smart but stubborn. Now, when we take her outside, she wants to stay and explore. Last week, as soon as we put her down outside she made a beeline for the door. This week the world isn't such a scary place and there's lots of fun things to do. There's worms to stick your nose on and then bark at because they wiggle. There's bunny poop to eat (if you can grab it before the humans get to you). There's the big dogs to chase. Digging's pretty fun and so is watching squirrels. So, we've had to get her a collar and lead so she can learn some manners and to come when she's called. She doesn't mind the collar so much but being attached to the lead is just not right, in her book. We just put it on her yesterday and this is as far as we have gotten so far.
Which evolves into this before long.


But before you think she is being abused this is how she usually waits for her breakfast or takes a nap if she can sucker Danny or, sometimes, our friend Don into it.  Here she was waiting for breakfast and was just too tired to stay awake.

Here, all the other fur babies were fed and her breakfast was ready. She woke up instantly.   

My next post will be about a setback on the tiny house and the progress we have made.